For as long as I can remember, every year at Christmas time my siblings and I head over to my Oma and Opa’s (my Dutch grandma and grandpa) to make Speculaas and Gevulde Speculaas, which are Dutch cookies that are to die for!!
My Opa passed away this summer, which was a very hard time for our family, and we’re all really missing him as we celebrate this season, but we thought he would want us to continue this fun family tradition(:
Most Americans are unfamiliar with Speculaas, and they are seriously missing out! It’s not that hard to make, so I thought I’d share the recipe. And don’t worry, it’s pretty simple to make, I just included a lot of helpful hints because most people are unfamiliar with this recipe. 😀
You need:
1 cup white sugar
1 cup brown sugar
1 cup butter (sticks)
4 eggs (only 2 go in the mix, the others will be used later)
1 tsp. baking soda
1 tsp. salt
5 tbsp. Speculaaskruiden
3 cups flour
1/2 cup almond slivers
1 tbsp. butter or margerine (or non-stick cooking spray)
A mixer
Measuring cups
A baking brush
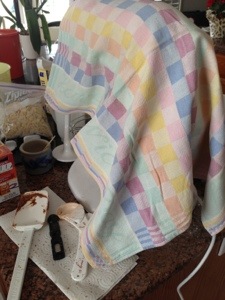
A small towel
A baking pan with at least and inch or two inch high sides
Preheat oven to 325 degrees F
*Speculaaskruiden is a Dutch spice used specifically in making Speculaas, and it’s hard to find in the States (we get ours when relatives visit or we visit The Netherlands). You can make it yourself using this recipe I found , or you can try a Google search and see what you find.
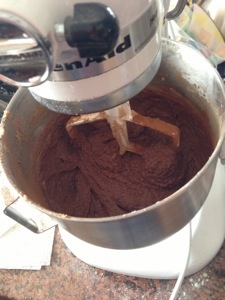
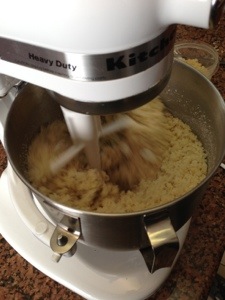
First, you add all the sugar, butter and only TWO eggs and mix on medium until it has a consistent texture and color – it’s extremely important that you use two eggs and no more because even adding a third egg will make the mixture too thin, I know from accidental experience lol)
Next, you can continue mixing while adding in the baking soda, salt, and Speculaaskruiden (the recipe says teaspoons, but I always use tablespoons; it doesn’t really make a difference, it just adds more flavor. I’d recommend using more if you like the smell of the spice).
When these are all nicely mixed in, you want to turn off the mixer and add the flower. Before turning the mixer on, I always put my towel over the top of the mixer because the flour will cause a mini snow storm otherwise! Mix on low until all the ingredients are well mixed together.
Then your dough should be ready, and it shouldn’t be sticky because you want to be able to roll it up into a ball. If it is a little sticky, you can try to add some more flour, but if you add a ton of flour it will become too dry-it’s a delicate balance. Either way, sticky or not, it will still come out tasting delicious, and if its sticky it will just be more difficult to get in the pan.
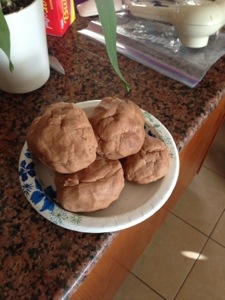
Now you want to roll the dough into balls, I usually do six or eight, and set them aside for a minute while you prep your pan.
 You could use some form of non-stick spray, but what we’ve always done was to coat the pan with a thin layer of butter using a baking brush.
Then you can take the dough balls, set them in your pan and then flatten it out until the whole pan is covered. Try not to get any on the sides because that will make it difficult to take out later.
Then take your remaining two eggs, and separate them into the whites and the yolks (you want the yolks). Stir the yolks with a fork until they’re all liquidy, and then coat the top of your flattened dough with this, using the brush again. You don’t have to use all of it, just get a nice full layer. Use this to have your almond slivers stick the the Speculaas. The yolk also make a sort of shiny finish that looks delicious!
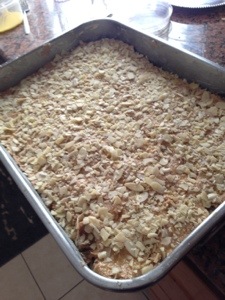
Now you can put your pan in the oven on 350 F for 45 minutes.
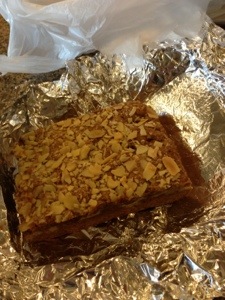
When you take it out, let it cool for a few minutes, and then turn it over onto wax paper. Once it’s completely cooled, you can cut it into small squares, and then what I usually do is put little sections into aluminum foil, turn them almond side up, and put them in the fridge. Speculaas, I think, is much better served once its cooled.
Now, the title of this post is Gevulde Speculaas, so I’ll share how to do that quickly – it’s my absolute favorite!
The only difference between plain Speculaas and Gevulde Speculaas is that Gevulde Speculaas has an almond spice filling. So when you roll the dough into six balls, you cover the bottom of the pan only with three of them. Then you add a thin layer of almond spice, and add the rest of the dough on top of this.
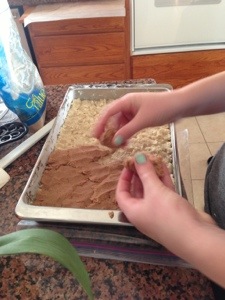 That’s the only change. Of course, I don’t think you can find almond spice at your local grocery, but it’s relatively simple to make:
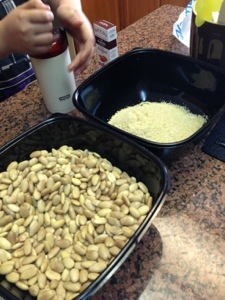
Take a few cups of raw almonds and put them in a pot of water. Bring this to a boil and then remove the almonds. Now that they’re all wet, the skins will literally slide right off if you squeeze them. Then you can put these in the oven for a few minutes to dry, and then use a food processor (we used an old coffee grinder) and mash ’em all up. Then for every two cups of almonds you have, add two cups of sugar, five egg whites, and a few drops of pure almond extract. Mix this up, put it in the fridge over night and voila! And it smells soooo good!
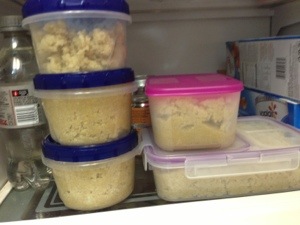
And the final product (or about an eighth of it)